Overview
The hip is a ball-and-socket joint. The ball is the femoral head, the top of the femur. The socket (acetabulum) sits in the pelvis. When cartilage wears away, from osteoarthritis, avascular necrosis, inflammatory arthritis, or damage after an injury, bone grinds on bone and every step hurts. Total hip replacement resurfaces both sides of the joint with a smooth metal-and-plastic implant.
The direct anterior approach replaces the same arthritic hip as a posterior replacement. The difference is the way in. We enter through a natural plane between muscles rather than cutting through them. No muscle is detached from bone, so the capsule at the back of the joint and the buttock muscles stay intact. That means fewer motion restrictions and often a faster early recovery. The implants and alignment are the same from the front or the back. Only the path in differs.
How the Procedure Works
The anterior approach replaces the same arthritic joint as a posterior hip. The key point: no muscle is cut or detached from bone. The steps below show how we enter through a natural plane and keep it that way.
Working Between the Muscles
We work through a natural gap between two muscles at the front of the hip. No muscle is cut and no tendon is released. The gap is opened, not created. We open the front capsule of the joint and bring the worn femoral head into view. You lie on a special table that lets us control the leg's position precisely throughout.
Removing the Worn Ball
We cut the neck of the femur at a level planned before surgery from your X-rays, then remove the arthritic ball. That cut level sets your leg length for the rest of the case, so it is measured, not estimated. Any bone spurs pressing on the hip-flexor tendon at the front of the joint are cleared at the same time.
Preparing the Socket and Placing the Cup
We prepare the socket until healthy bone supports the new cup all the way around. Then we press the cup into place at carefully chosen angles. A small change in either direction changes the risk of dislocation and the rate of wear, so we check the cup's position on live X-ray against the pelvis itself, rather than trusting the eye through a small window.
Preparing the Femur
Reaching the femur from the front is the demanding part of the operation. We position the leg to bring the upper femur into the wound, releasing tissue at the back only as needed, never routinely. We then prepare the inside of the bone step by step until the stem fits snugly and does not twist.
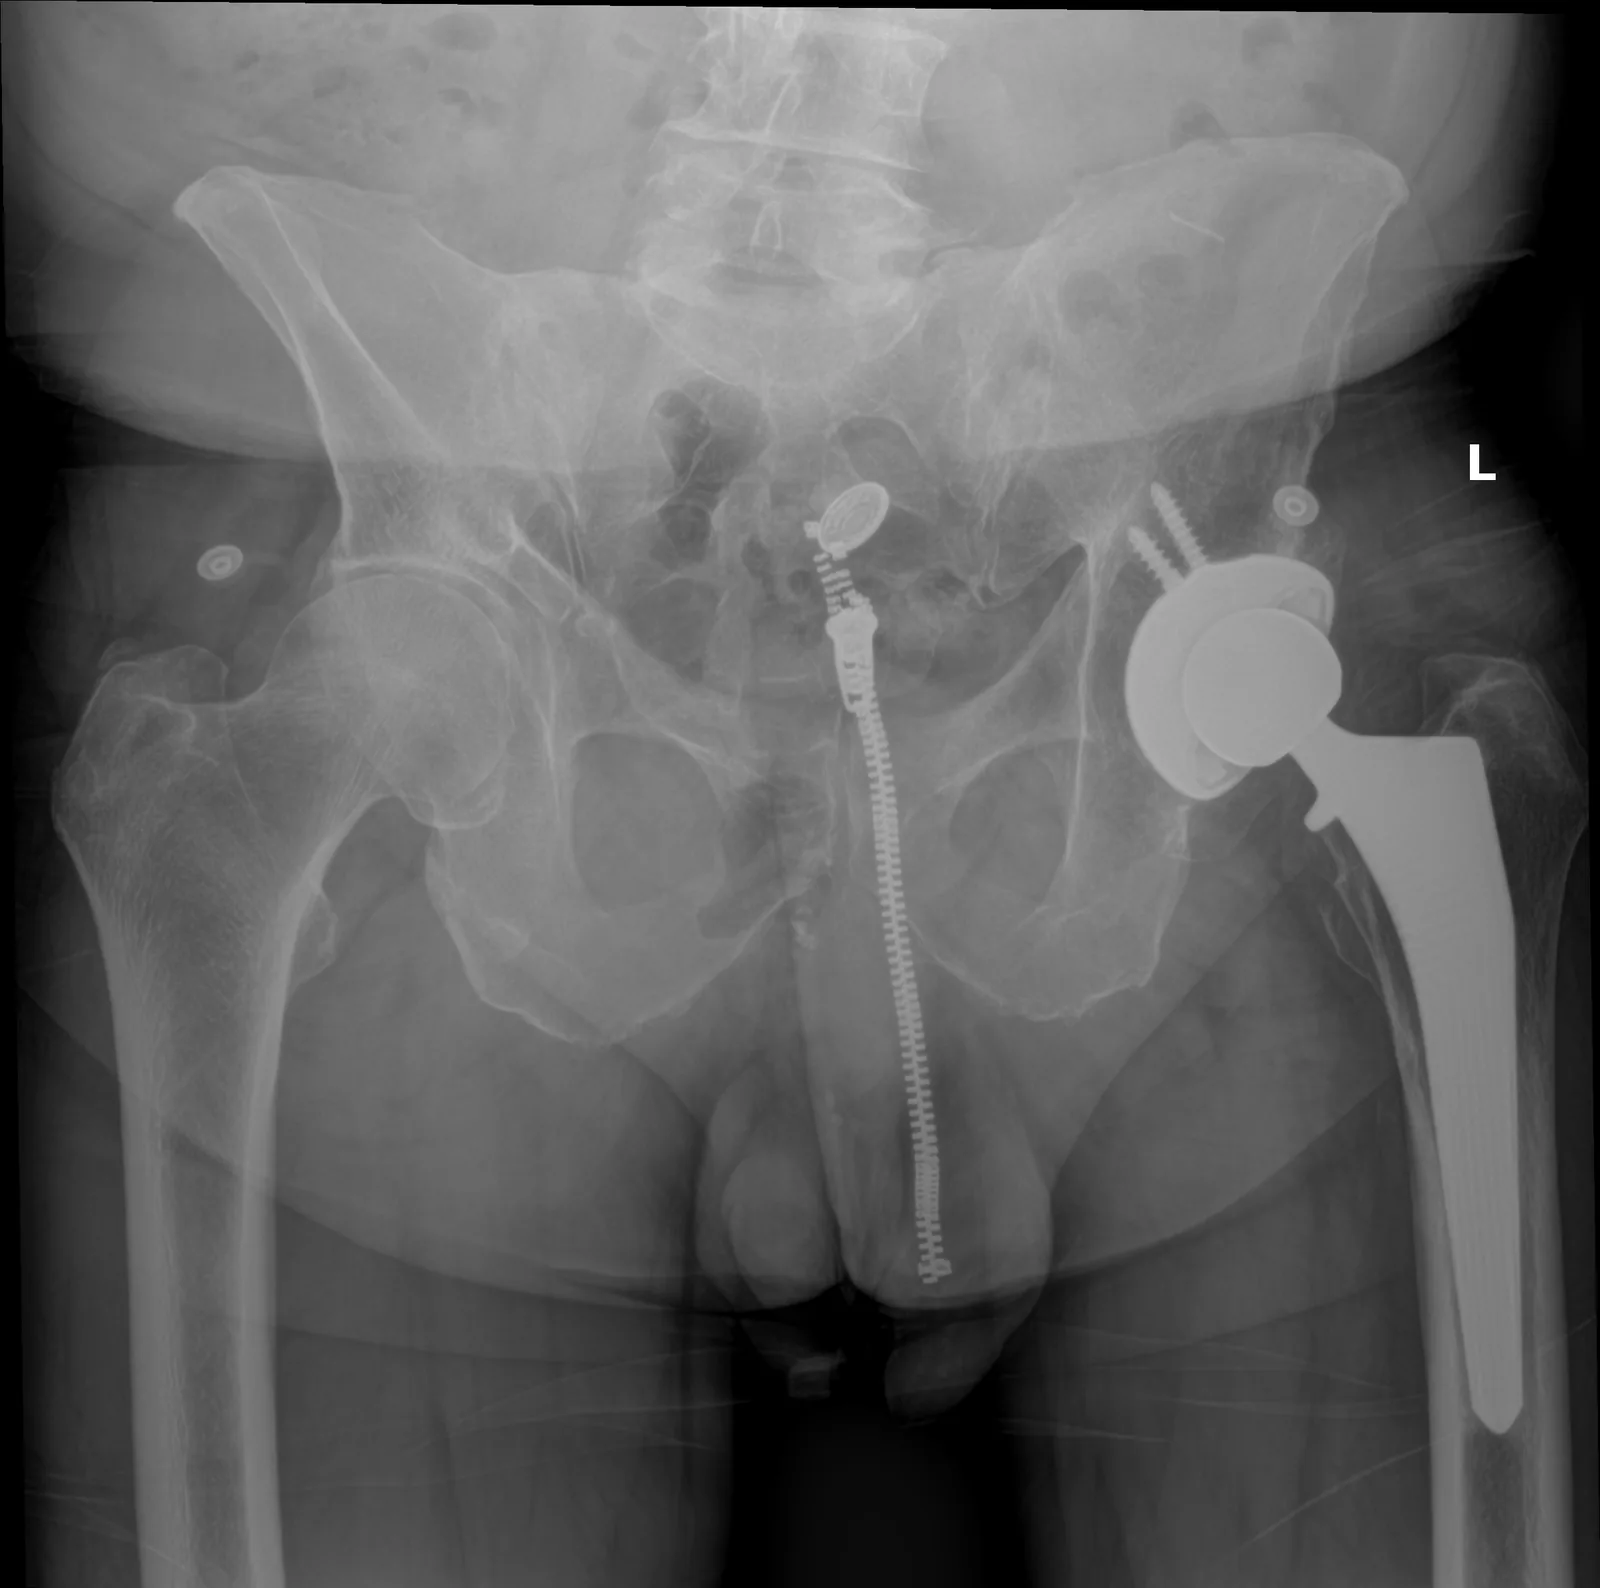
Test Fit, Leg Length Check, and Final Placement
We place a trial ball and put the hip back together. Then we confirm leg lengths on live X-ray and against your other side. We test stability through a full range of motion before locking anything in. The final stem goes in, a ceramic or metal ball is seated, and the front capsule is repaired. The capsule at the back and the buttock muscles are never touched. That is why the strict "hip precautions" of posterior surgery are not needed afterward.
When to Consider Anterior Total Hip Replacement
We generally offer anterior total hip replacement when your symptoms, your imaging, and a full course of non-surgical care all point the same way. The typical picture includes:
Arthritis That Limits Function
Hip pain from osteoarthritis, avascular necrosis (bone death from lost blood supply), or dysplasia (a shallow or malformed hip socket). Non-surgical care has not helped.
Preference for Fewer Restrictions
Patients who want to skip the strict posterior hip precautions and get back on their feet sooner.
Anatomy Suited to the Approach
A body build and thigh-bone shape that allow safe access from the front. We assess this before surgery with imaging.
Conditions This Treats
Risks & Why We Still Recommend It
Every operation carries risk. This procedure is offered because the condition, when left untreated, can cause groin and thigh pain with every step, lost range of motion, and a slow shortening of the leg. The decision to proceed weighs the risks of surgery against the limitations the condition places on daily function. Surgery does not remove risk; it addresses a problem that is otherwise progressive. Whether it is appropriate is determined for each patient in consultation with the surgeon.
The risks we discuss with you before anterior total hip replacement include:
- bleeding and infection (including rare deep infection around the implant, called periprosthetic infection)
- anesthesia risk
- blood clot in the leg or lung, reduced with blood thinners, walking, and compression stockings after surgery
- dislocation (less common with the anterior approach but still possible)
- leg-length discrepancy
- numbness over the front of the thigh from irritation of a small skin nerve, usually temporary
- a break in the bone around the implant, more often on the thigh-bone side
- component loosening or wear over time
Surgery is right when end-stage hip arthritis causes daily pain and lost function that has not improved with non-surgical care. If that picture does not fit you, this operation is not offered.
Frequently Asked
questions we hear in clinicHow is the anterior approach different from a regular hip replacement?
The implants and alignment are the same from the front or the back. Only the path in differs. We enter through a natural plane between muscles rather than cutting through them, and no muscle is detached from bone. That means fewer motion restrictions and often a faster early recovery.
Will I have to follow strict hip precautions afterward?
The capsule at the back of the joint and the buttock muscles are never touched during anterior surgery. That is why the strict "hip precautions" of posterior surgery are not needed afterward.
How do you make sure my legs end up the same length?
The femoral neck cut that sets your leg length is planned before surgery from your X-rays, measured rather than estimated. Before anything is locked in, we place a trial ball and confirm leg lengths on live X-ray and against your other side. A leg-length difference is still a listed risk, which is why it is checked this carefully.
Could the new hip dislocate?
Dislocation is less common with the anterior approach but still possible. Cup position drives that risk, so we check the cup's angles on live X-ray against the pelvis itself before finishing.
Is the anterior approach right for everyone?
No. It takes a body build and thigh-bone shape that allow safe access from the front, which we assess before surgery with imaging. Surgery itself is offered only when end-stage hip arthritis causes daily pain and lost function that has not improved with non-surgical care.
Further Reading
Outside reading we trust, plus related OSI pages: